How to Make Your Own Natural Face Masks Using Essential Oils

Sometimes, it is very difficult to take the time to do anything these days for ourselves. But that is life, so why not take the time out for you once in a while, for a quick and easy homemade face mask or as some would call it face packs. It is, in my opinion, one of the best facial treatments that you can have. And with good reason as it provides deep pore cleansing, stimulation assists in anti aging and not to mention improves your skin!
Using a clay and essential oil mask is not a new concept or idea. Many spas have been using them for years. I have included a couple of ideas for different skin types for you to try at home without the spa price, give it a try, it will leave your skin glowing.
First, let’s choose the right clay for your skin type as each one has its owns healing properties. For best results, use the face mask only once a week.
Here is the quick breakdown on clays:
1) Green clay also known as Bentonite or Zeolite clay helps to draw toxins from the skin and can calm inflammation. It is very effective for reducing acne or redness in the skin. It is considered one of the best and has become the talk of the spa world.
Some of the benefits green clay:
- superior absorbent capacity
- cleanses
- clarifies
- purifies the skin
- clay is extracted by hand; it is very pure, soft and revitalizing.
2) White clay also known as Kaolin clay, China clay, Cosmetic clay soothes and softens the skin and is suitable for all skin types. This is the gentlest of all the clays and it is suitable for aged or dry skin as well. It is found in practically in all powdered and dry cosmetics as well most wet cosmetics. Its natural absorbent properties makes it essential in hygiene products and is often found in soaps, scrubs, deodorants, facial powders and masks. It is the mildest of all clays and is suitable to add to products created for people with sensitive skin.
Some of the benefits of Kaolin clay/White clay:
- helps stimulate circulation to the skin while gently exfoliating and cleansing it
- does not draw oils from the skin, so it can also be used on dry skin types without negative results
- high in calcium, silica, zinc and magnesium, which are beneficial for oily, blemished skin
3) Red clay can be suitable for dry and sensitive skins.
Some of the benefits red clay:
- high presence of iron oxide
- rich in trace elements
- cleanses the skin
- revitalizes the appearance
- leaves the complexion looking radiant
4) Pink clay is particularly useful for toning dull, tired, or devitalized skin.
Some of the benefits pink clay:
- excellent cleansing properties
- balanced blend of iron oxide, silica and mineral salts
- medium absorbency
- effective cleanser for sensitive skin types
- smoothes and re-textures the skin
How to make it now…it is so simple:
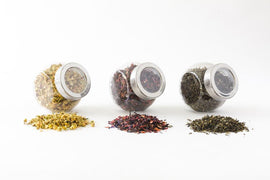
All the above clays can be mixed with your choice of dry and wet ingredients. Be creative and experiment, experiment, experiment! A couple of ideas are : Green tea, powdered milk, oatmeal, cornflower, dried or powdered herbs, dried roses, lavender, etc., have all been added to the clays in various concentrations. Experiment with what feels and smells good. Each dry ingredient will have its own special properties as well.
As far as wet ingredients go, the list is endless: essential oils, jojoba oil, olive oil,floral waters, distilled water, vegetable oil, milk, honey, yogurt, wine, mashed bananas or strawberries... let your imagination and budget be your guide.
Here is a recipe I tried this weekend! The following recipe is for a rejuvenating, soothing and smoothing mask.
1 tablespoon Zeolite Clay
1 tablespoon cornflower
1/2 teaspoon powdered raw oats
2 drops of geranium essential oil
Pick any wet dry ingredients or with water or a floral water such as rosewater or pure distilled water) and mix all dry ingredients in a bowl until it is the consistency of a paste.
Before applying the mask, make sure that the skin is clean and dry it off by patting it with a towel. Smooth the paste onto your face, avoiding the eyes of course, and wait approx 15 minutes for it to dry. Wash it off in the sink with lukewarm water and then a quick splash of cool water to seal your pores.
As a suggestion, if you have not used essential oils before, always perform a skin patch test as you might be prone to allergies from any of the oils.
More tips and helpful hints: Here are some essential oils that you can use to enhance your face masks as per your skin type.
Normal Skin Face Mask:
For normal skin, mix the clay/kaolin, cornflower and oats together with any wet ingredient and some floral water. Add 1 drop of Geranium oil and 1 drop of Neroli oil. Mix well to form a nice consistent paste and apply.
Dry Skin Face Mask:
For dry skin, mix the clay/kaolin, cornflower and oats together with any wet ingredient and some floral water. Add 1 teaspoon Wheatgerm oil or Evening Primrose Oil plus one 1 drop of Chamomile (Roman and German) oil and 2 drops of Carrot Seed oil. Mix well to form a nice consistent paste and apply.
Oily Skin Face Mask:
For oily skin, mix the clay/kaolin, cornflower and oats together with any wet ingredient and some floral water. Add 1 drop of Lavender Oil, 1 drop of Juniper Berry Oil and 1 drop of Frankincense Oil. Mix well to form a nice consistent paste and apply.
Sensitive/Problem Skin Face Mask:
For sensitive and problematic skin, mix the clay/kaolin, cornflower and oats together with any wet ingredient and some floral water. Add 1 drop of Lavender Oil, 1 drop of Neroli Oil and 1 drop of Tea Tree Oil. Mix well to form a nice consistent paste and apply.
Rejuvenating Skin Mask:
To rejuvenate your skin, mix the clay/kaolin, cornflower and oats together with any wet ingredient and some floral water. Add 1 drop of Chamomile Oil, 1 drop of Frankincense Oil and 1 drop of Myrrh Oil and 1 Teaspoon of Jojoba Oil. Mix well to form a nice consistent paste and apply.
Enjoy!
Please share your favorite recipes with us at Sunrise Botanics.
Email them to us at info@sunrisebotanics.com


